Saturday, December 3, 2005
As mentioned in a previous article, we’ve been playing around with the ASP.NET 2.0 Menu control and SiteMap to put together a tabs-ish layout for one of our newest projects.
Like with the tabs themselves, roles are something that we previously “rolled-our-own” on, implementing a custom roles based permissions into our own Tabs class. You will see this in an upcoming entry covering that code, but for this project, we decided to tap into ASP.NET’s built in Role Provider. It seemed only appropriate, as the sitemap and menu have built in support for it!
If you didn’t catch the article talking about the implementation of the tabs themselves, I’ll refresh your memory on the layout that we have going. It essentially looks like this:
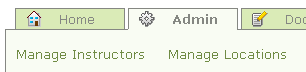
Now, a user may have the ability to
- Manage Locations
- Manage Instructors
- Neither
- Both
And accordingly, we would like the tabs to disappear.
Our first task is to set the SiteMap to use these new roles. We’ll setup three roles: Admin, ManageInstructors, ManageLocations. We can simply add these roles to each of the nodes in our sitemap that need to be protected.
<?xml version="1.0" encoding="utf-8" ?>
<siteMap xmlns="..." >
    <siteMapNode url="" title="Home"  description="">
        <siteMapNode url="~/Default.aspx" title="Home" />
        <siteMapNode url="~/Admin.aspx" title="Admin"
            roles="Admin" >
        <siteMapNode url="~/ManageInstructors.aspx"
            title="Manage Instructors"
            roles="ManageInstructors" />
        <siteMapNode url="~/ManageLocations.aspx"
            title="Manage Locations"
            roles="ManageLocations" />
    </siteMapNode>
.
.
.
    </siteMapNode>
</siteMap>
Once there are roles setup in the sitemap file, when a user visits a page, ASP.NET uses the configured RoleProvider (either the default, or a custom one specified in the web.config file) to determine whether the user is in the role specified for that page. THEN, it checks the web.config to make sure that the role is allowed to see that page. This means, that in order to set up the menu to use roles, the web.config must be setup appropriately as well.
First, we will create our custom RoleProvider….
Because our users are stored in the SQL server, and already have bit-column based permissions associated with them, we will need to write our own RoleProvider, and plug it into the application. ASP.NET will then use our code instead of the default.
To start, we create a CustomRoleProvider, and derive from System.Security.Permissions.RoleProvider
Because all we want to do at this point is to determine which tabs should be shown to which users, our RoleProvider is going to be READ ONLY. Thus, most of the functions, such as CreateRole, can simply throw a NotSupportedException.
In fact, the only function that we need to worry about implement is GetRolesForUser(username as String). This is the function called when a user visits a page, and ASP.NET needs to determine whether the current user is Authorized. The username that gets passed is the Indenty.Name that is set when the user logs on. For us, this is the UserID from the database for that user. So, our GetRolesForUser function looks like this:
Public Overrides Function GetRolesForUser(ByVal username As String) As String()
Dim user As New UserEntity(username)
If user.IsNew Then Throw New Exception("Invalid Username: " & username)
Dim roles As New ArrayList
If user.ManageInstructors Then roles.Add("ManageInstructors")
If user.ManageLocations Then roles.Add("ManageLocations")
If user.ManageLocations Or user.ManageInstructors Then roles.Add("Admin")
Return CType(roles.ToArray(GetType(String)), String())
End Function
This function returns a string array of the roles that user belongs to, based on the permissions from the user object. You’ll notice here that the “Admin” role is actually a logical combination of the two other permissions. In this manor, we can hide the Admin tab completely if the user does not have either of the two permissions contained therein. Pretty SWEEET.
At this point, we need to build, and configure out role provider in the web.config file. This will force ASP.NET to call OUR function when needed, instead of the default. The section in the web.config file looks like this:
<roleManager enabled="true"
    defaultProvider="CustomRolesProvider">
    <providers>
        <add name="CustomRolesProvider"
            type="CustomRolesProvider"
            description="Custom Roles Provider" />
    </providers>
</roleManager>
This get’s placed in the section. Very simple here, we set the defaultProvider to match the name of our provider, and the type attribute to match the name of our class and assembly.
Another caveat in the web.config actually, is that we need to override the default SiteMapProvider to enable it to use roles based security. This section is located in the same area as the one above. The key here is the securityTrimmingEnabled=”true” attribute. This tells the provider to take into account the roles provided.
<siteMap defaultProvider="XmlSiteMapProvider"
    enabled="true">
    <providers>
        <add name="XmlSiteMapProvider"
            description="Default SiteMap provider."
            type="System.Web.XmlSiteMapProvider "
            siteMapFile="Web.sitemap"
            securityTrimmingEnabled="true" />
    </providers>
</siteMap>
At this point, if we were to debug our application, and browse to one of the pages protected by the sitemap, we *should* be able to catch a breakpoint in our custom role provider. Hurray!
However, the tabs will continue to be visible, due to the fact that we have not set up appropriate authorization sections in the web.config file.
Now, because we are protecting only the Admin pages in our site with roles, but all other pages with a login page, we have a default rule to deny unauthorized users. In the section:
<authorization>
    <deny users="?"/>
</authorization>
In order to add role-based protection to the files in the sitemap file, we will need to add a tab for each file, denying access to all users, and then allowing access to those specific roles. For example:
<location path="ManageInstructors.aspx">
    <system.web>
        <authorization>
            <allow roles="ManagePicklist" />
            <deny users="*" />
        </authorization>
    </system.web>
</location>
NOTE: The DENY comes AFTER the ALLOW. I originally had these backwards and was completely confused as to why this did not work.
You will need a section like the above for each of the files, in our case: ManageInstructors.aspx, ManageLocations.aspx, Admin.aspx
Congratulations! At this point, you should be able to toggle the tabs for a particular user by changing their permissions in the database. The sitemap/menu will call the GetRolesForUser function, to determine which roles the user is in, and ASP.NET will then determine from the sitemap and the web.config whether or not that user is allowed to see/visit that page.
Pretty slick I must say.
In a future article, I will cover our implementation of the Tabs control, and how we went about implementing a roles system.
Dusty Davidson
Lead Developer